Quick Binds
Standard Operating Procedure (SOP): Processing Quick Binds in Expert InsuredOverview: This SOP provides comprehensive step-by-step instructions for completing quick binds in Expert Insured. This process is typically used in three situations: digital binds (quoting/binding occurs on the carrier’s website), data migration, and mid-term BORs (to record new business BOR in the system). The scope includes creating the submission and using the quick bind feature to complete the bind process.
Prerequisites: Access to and familiarity with Expert Insured
Detailed Procedure
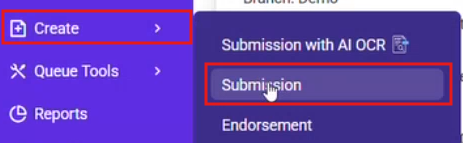
1. Open/create the insured’s account in Expert Insured
1.1. Navigate to Expert Insured and log in >> Go to Create >> Select Submission.
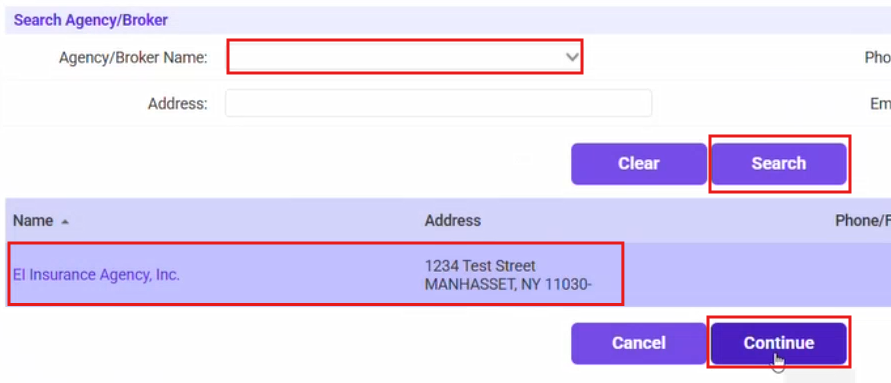
1.2. Search for and select the agent >> Click Continue.
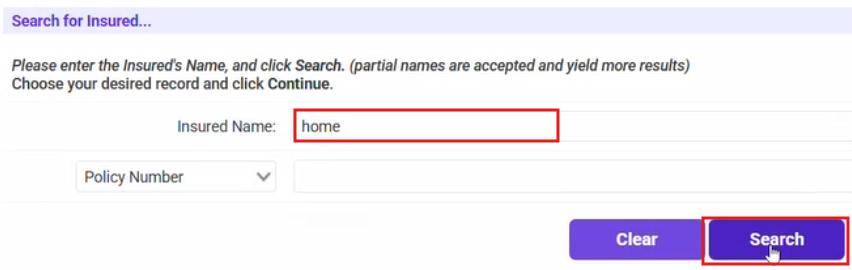
1.3. Enter the insured’s name >> Click Search.
1.4. Select the insured’s name >> Click Continue
1.4.a. If the insured is not in the system, click New Insured and enter their information.
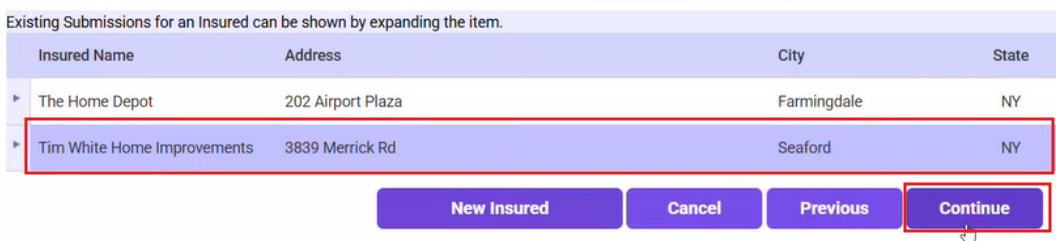
1.5. Confirm the information listed is accurate >> Click
Continue.

2. Enter the submission information
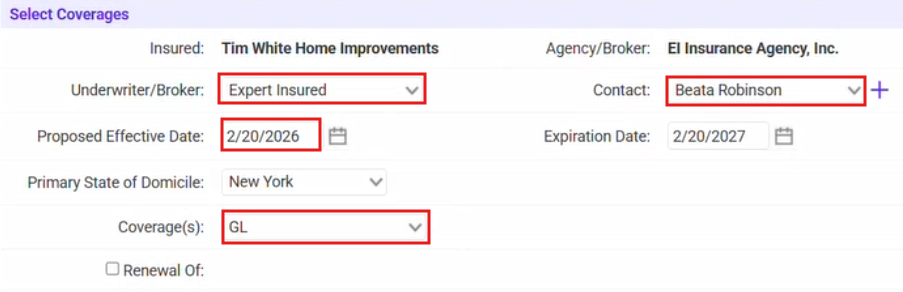
- 2.1. Fill in the Coverages information.
-
- 2.1.a. Select the Underwriter/Broker >> Select the agent in the Contact field.
- 2.1.b. Enter the Policy Dates >> Select the Coverage(s).
-
3. Use the Quick Bind feature to complete the bind process.
-
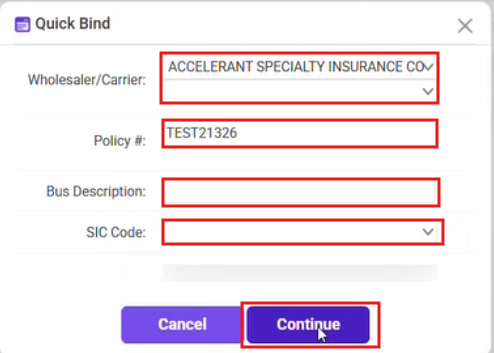
- 3.1. Click Quick Bind.

-
- 3.2. Enter the Wholesaler/Carrier >> Enter the Policy Number >> The Business Description and SIC Code can also be entered (but are not required) >> Click Continue.
-
-
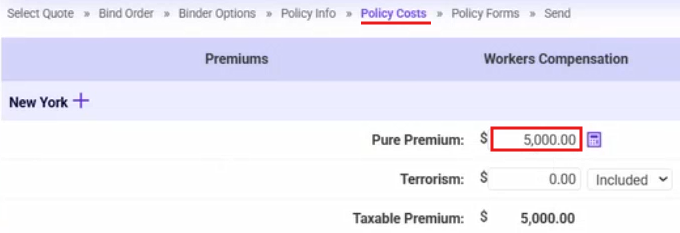
- 3.3. Enter the policy premium and taxes/fees as usual.
-
-
- 3.4. Click Continue
-

-
- 3.5. Confirm the information listed on the Policy and Accounting Verification window >> Check the verification box >> Click Continue.
-

4. If the policy and invoice need to be sent to the agent, attach the policy in EI.
-
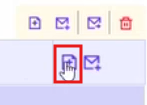
- 4.1. Click on Documents.

-
- 4.2. Click Attach Document.
-
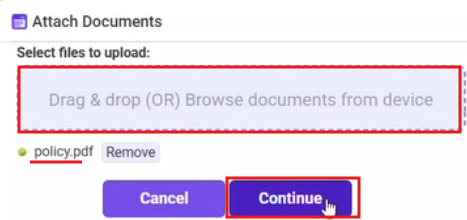
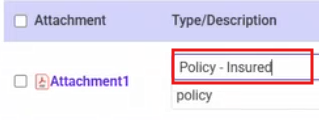
- 4.3. Drag and drop the policy document into the window >> Click Continue >> Select ‘Policy-Insured’ as the Type >> Click Continue >> Close the Documents window.
-
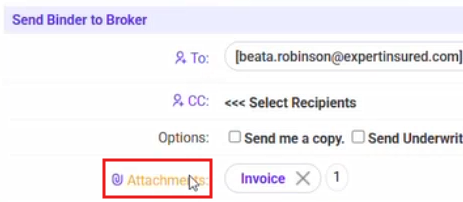
- 4.4. Click on Attachments.
-
-
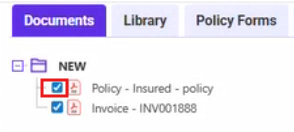
- 4.5. Check the box next to the Policy document >> Send the email to the agent as usual.
-
-
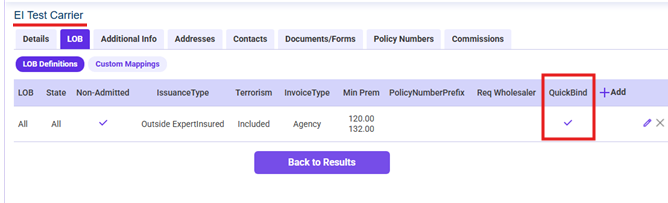
Important Note:
To use the Quick Bind feature, the carrier must be set up for ‘Quick Bind’ in EI.
-