Processing a Notice of Cancellation
- Go to Create >> Select Cancellation Notice.
- Enter the policy number (or insured’s name) >> Click Search.
- Select the applicable result >> Click Continue.
- Enter the Cancellation Effective Date >> Select the Reason for Cancellation >> Click Continue Notice.
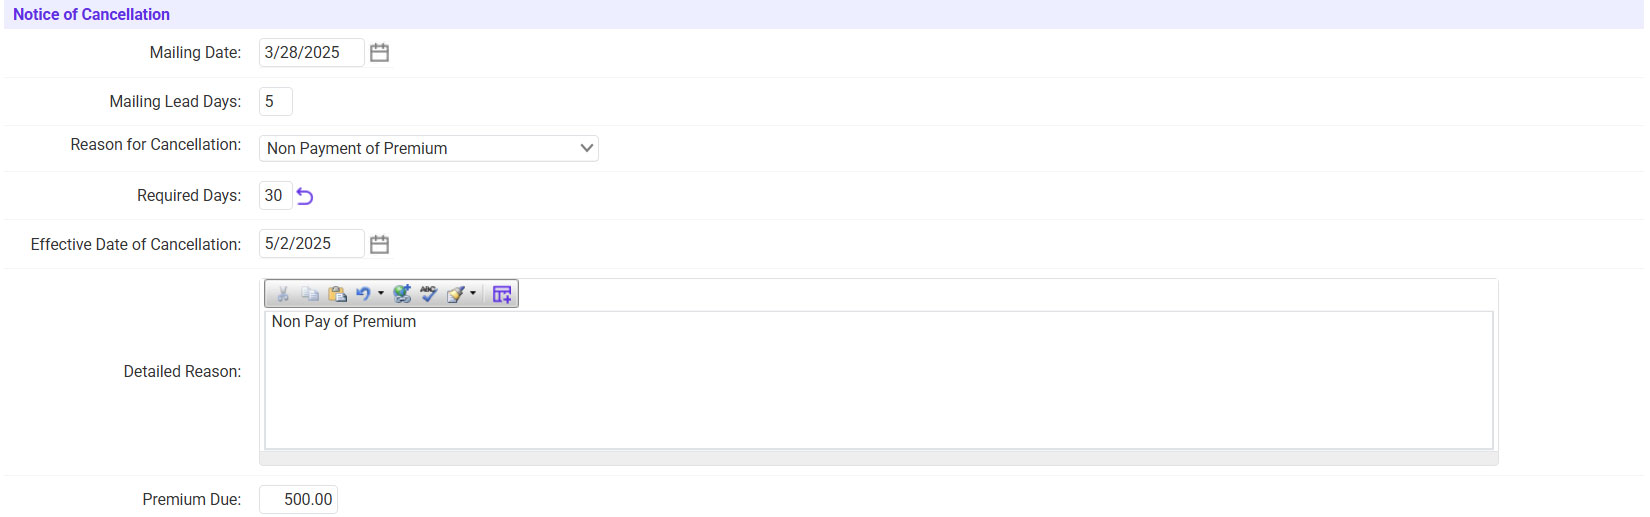
- Fill in the NOC information.
- Enter the Mailing Date.
- Confirm the Reason for Cancellation.
- If needed, enter any additional details surrounding the reason.
- For Non-Pay, enter the Premium Due.
- Click Continue.
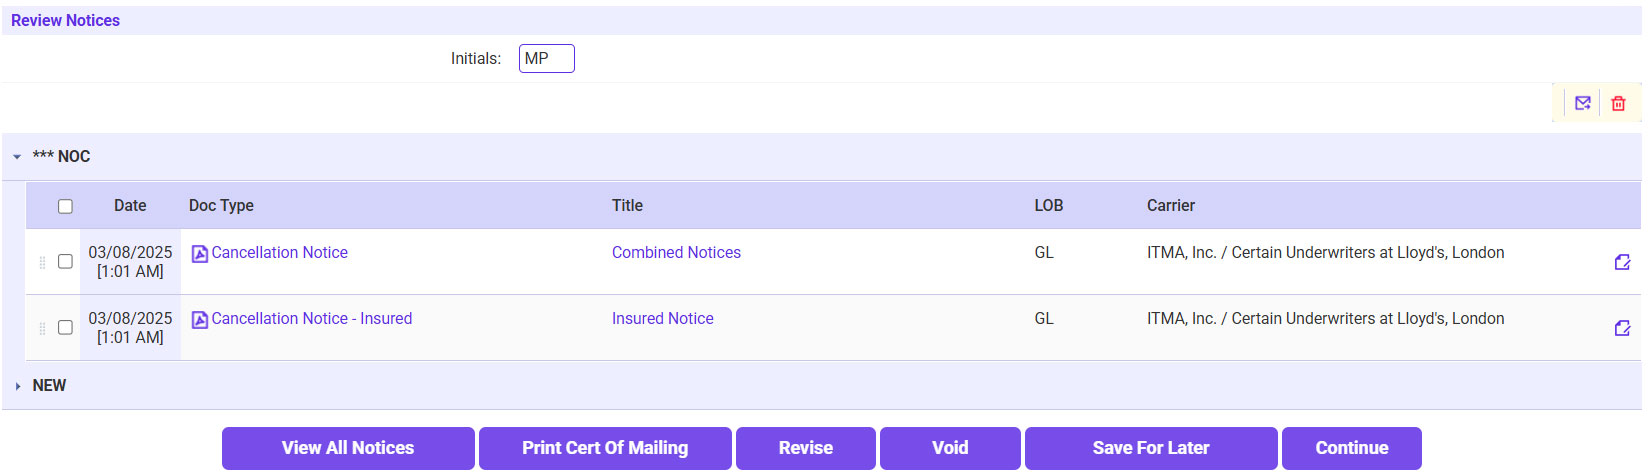
- Enter your initials >> If needed, print the Mailing Certificate >> Click Continue.
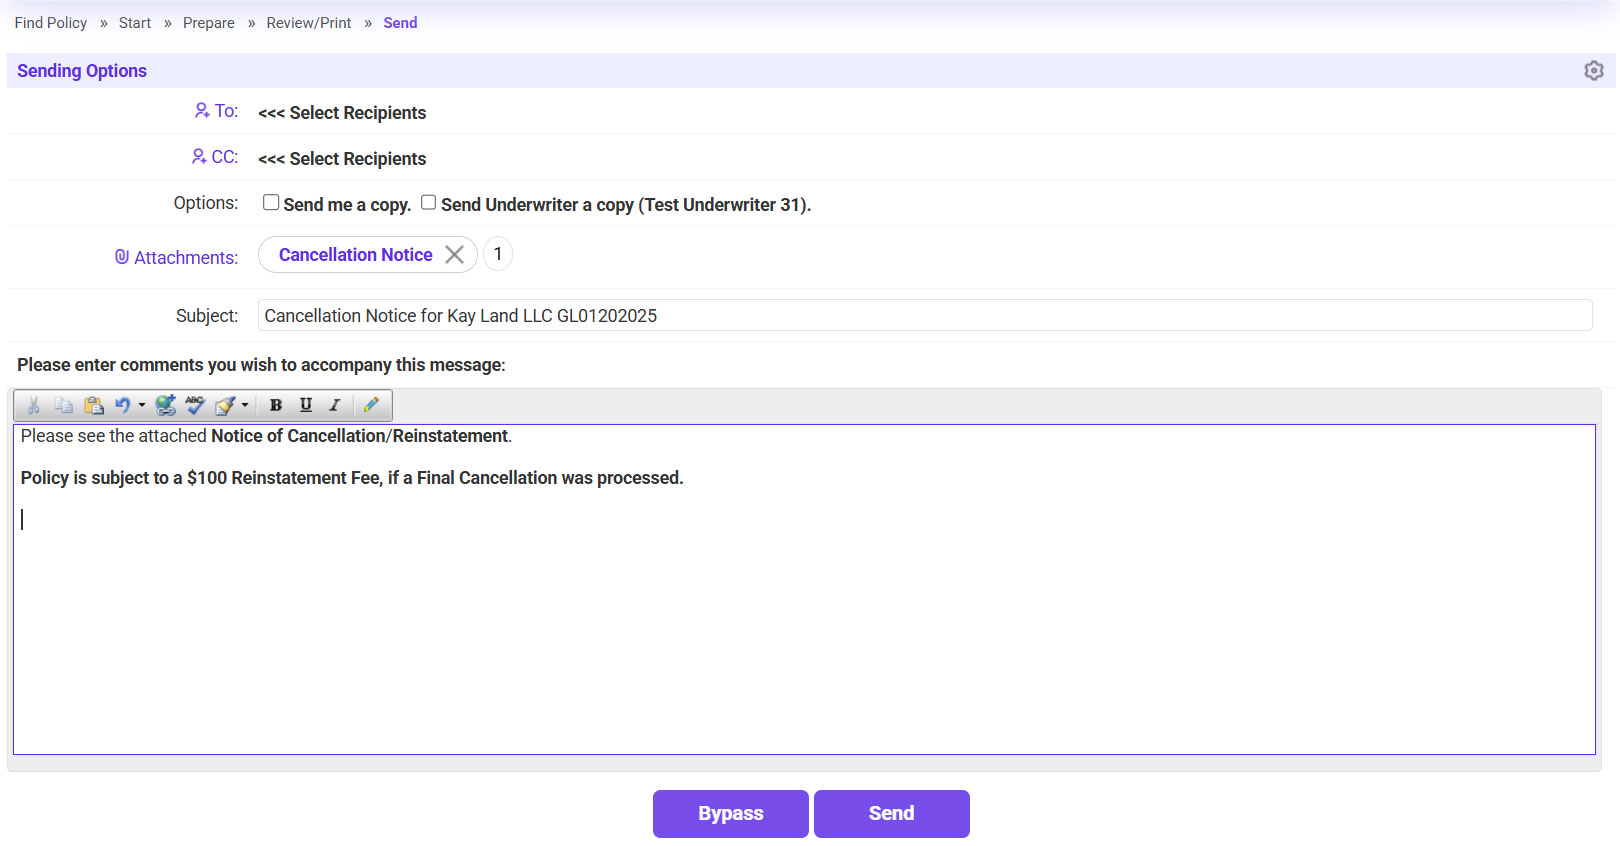
- Send the NOC to the agent.
- Click on the ‘To’ link and select the agent’s email address.
- If needed, include a copy for yourself or the UW.
- Click Send.


LPR Request
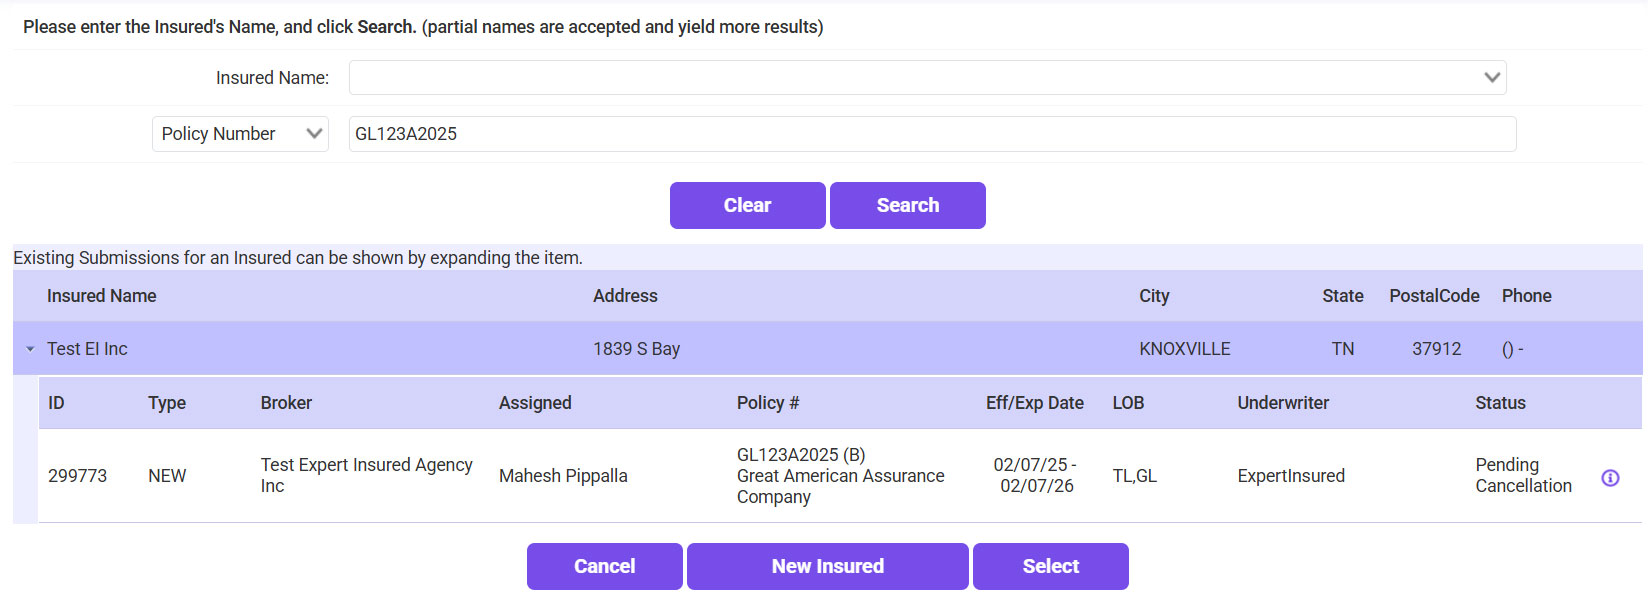
- If an agent sends in an LPR Request, look up the provided policy number/insured to confirm the policy details.
- Go to Find >> Select Insured.
- Enter the policy number/insured’s name >> Click Search >> Select the policy.
- Confirm the policy details to verify the correct policy is being cancelled.
- Once the policy details have been confirmed, go to Create >> Select Cancellation Notice.
- Search for the policy using the policy number/insured’s name.
- Select the policy >> Click Continue.
- Enter the Cancellation Effective Date requested >> Select ‘Insured Request’ for the Reason >> Click Attach Notice.
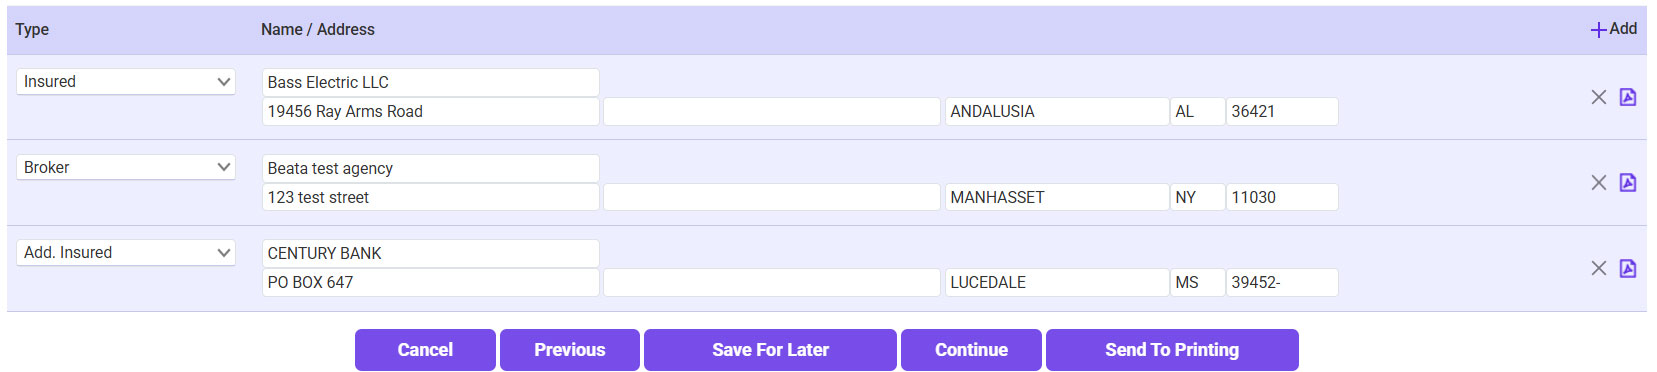
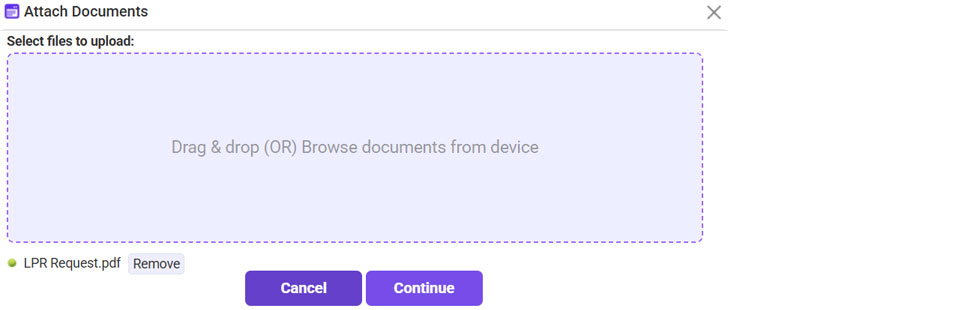
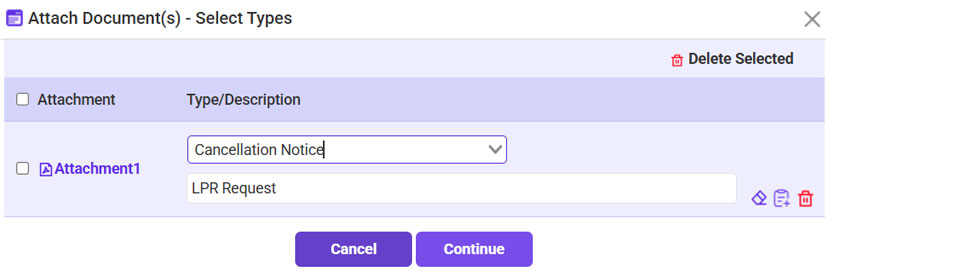
- Attach the cancellation request from the agent/insured.
- Click on the plus sign icon next to the NOC section.
- Click Browse >> Select the LPR Request >> Click Continue.
- For the Type, select Cancellation Notice >> Click Continue.
- Once the request is attached, click Send to forward it to the carrier.
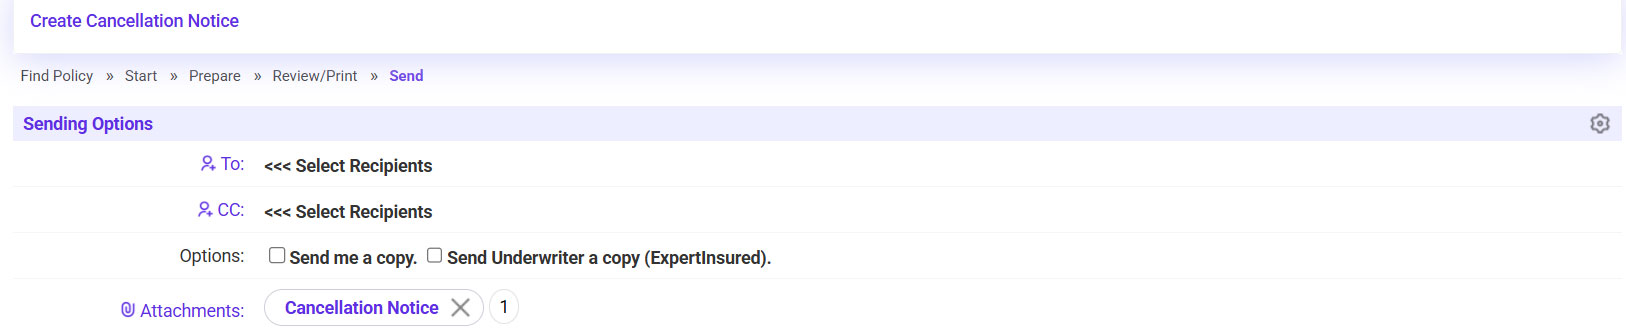
- Send the LPR Request to the carrier.
- Click on the ‘To’ link >> Select the carrier’s email address.
- Click Send.
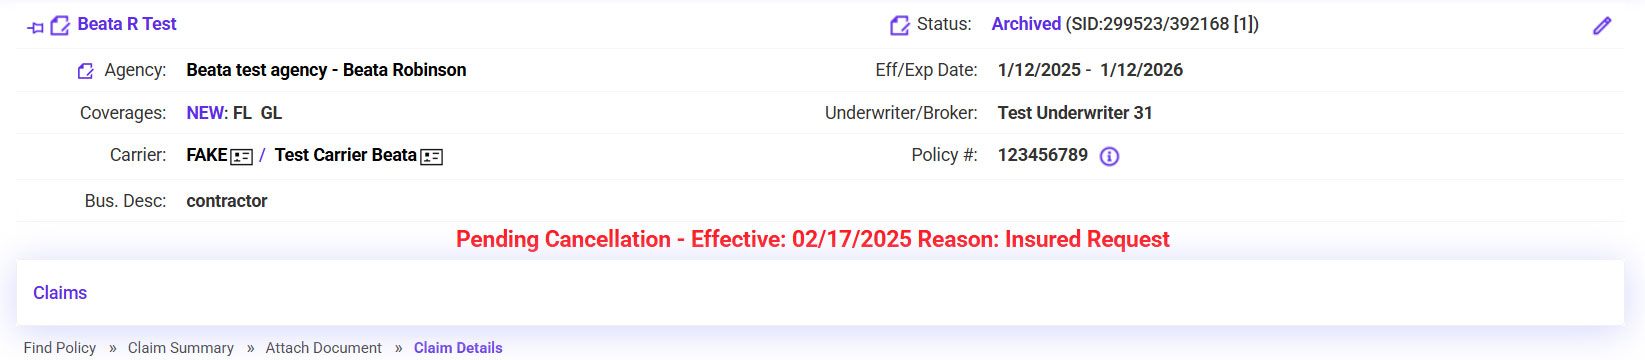
- Go to Find >> Insured >> Look up the policy again to confirm the Status is ‘Pending Cancellation’.

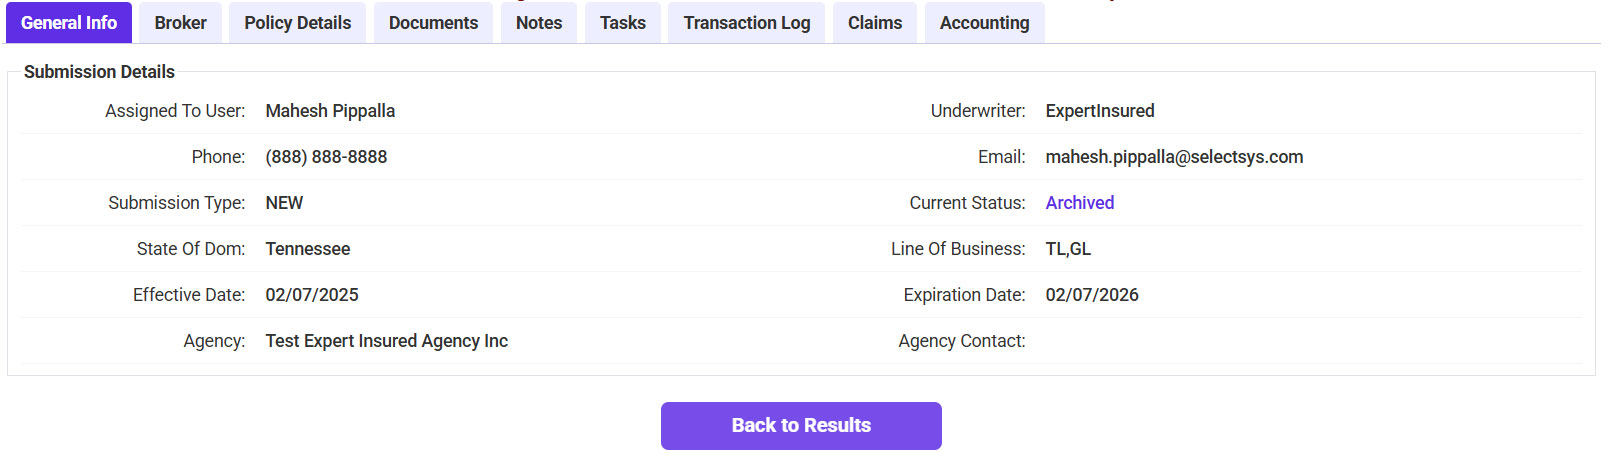


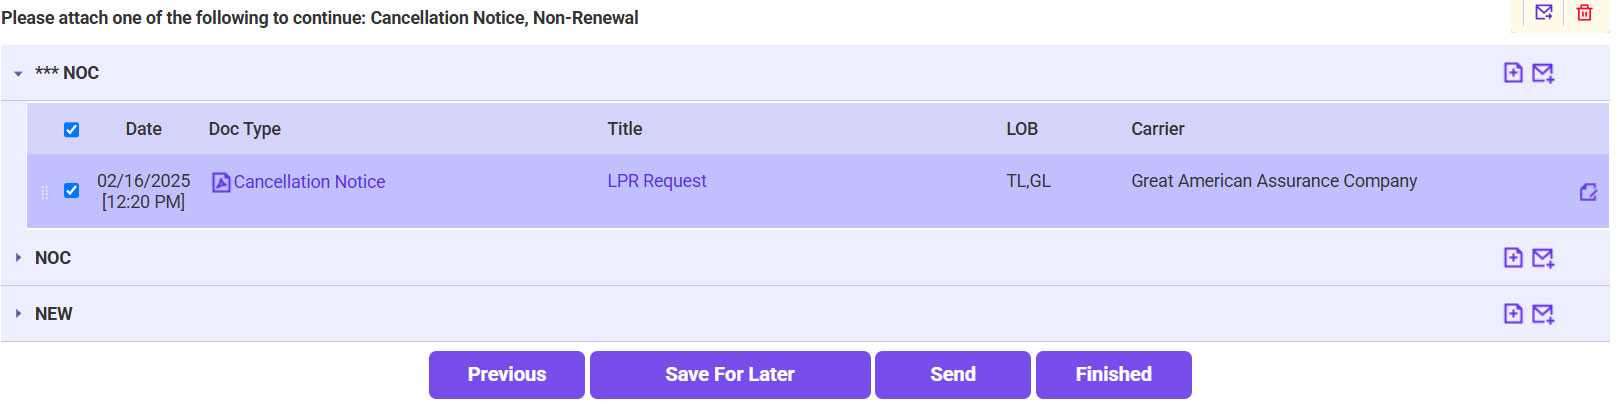
*When the policy is opened, it should show the pending cancellation effective date and reason.