Create Endorsements
Summary: Create the endorsement in Expert Insured. Make the change and issue the endorsement. Email the endorsement/invoice.
- Go to Expert Insured and log in >> From the Home page, go to Create >> Select Endorsement.

- Locate the policy you are endorsing.
- Enter the policy number or insured’s name >> Click Search.
- Select the applicable result >> Click Continue.


- Enter the Endorsement Effective Date >> Enter the Endorsement Reason into the Summary field >> Click Continue.

- Make the change.
- Any changes to the Insured’s Name, Mailing Address, Location Address, or Effective Date can be made on the Policy tab.
- Any changes to the classification/limits can be made on the GL tab.
- To add a class code: Click on the magnifying glass icon to look up the code.
- Search for and select the applicable code (using the code or description) >> Click Update.
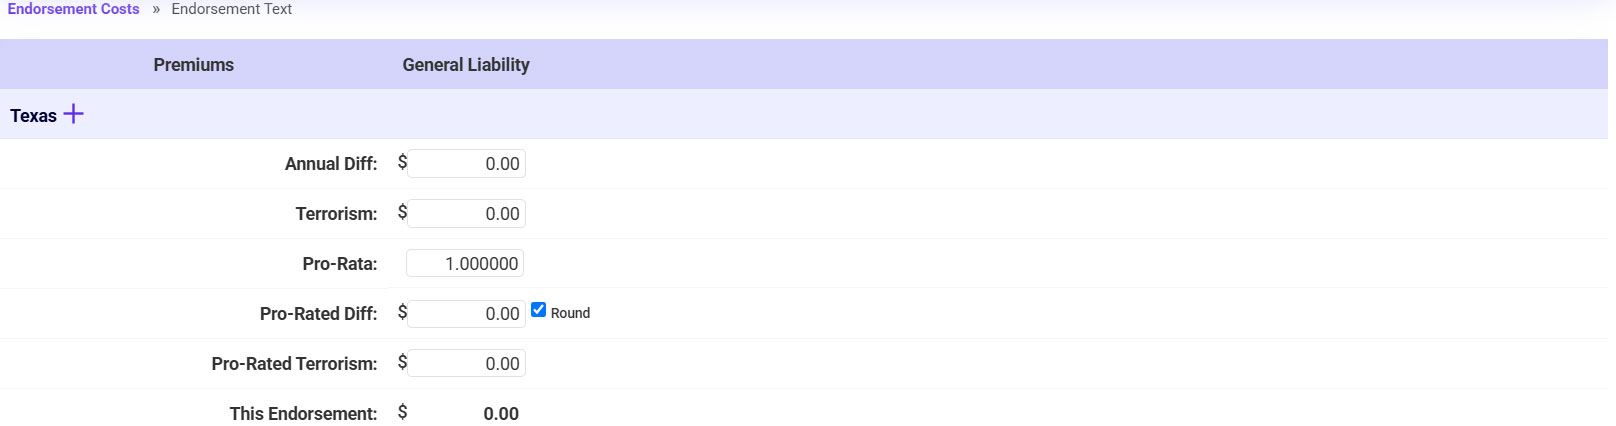
- Enter the Exposure and Rate. Any additional premium will be calculated. Click Continue.
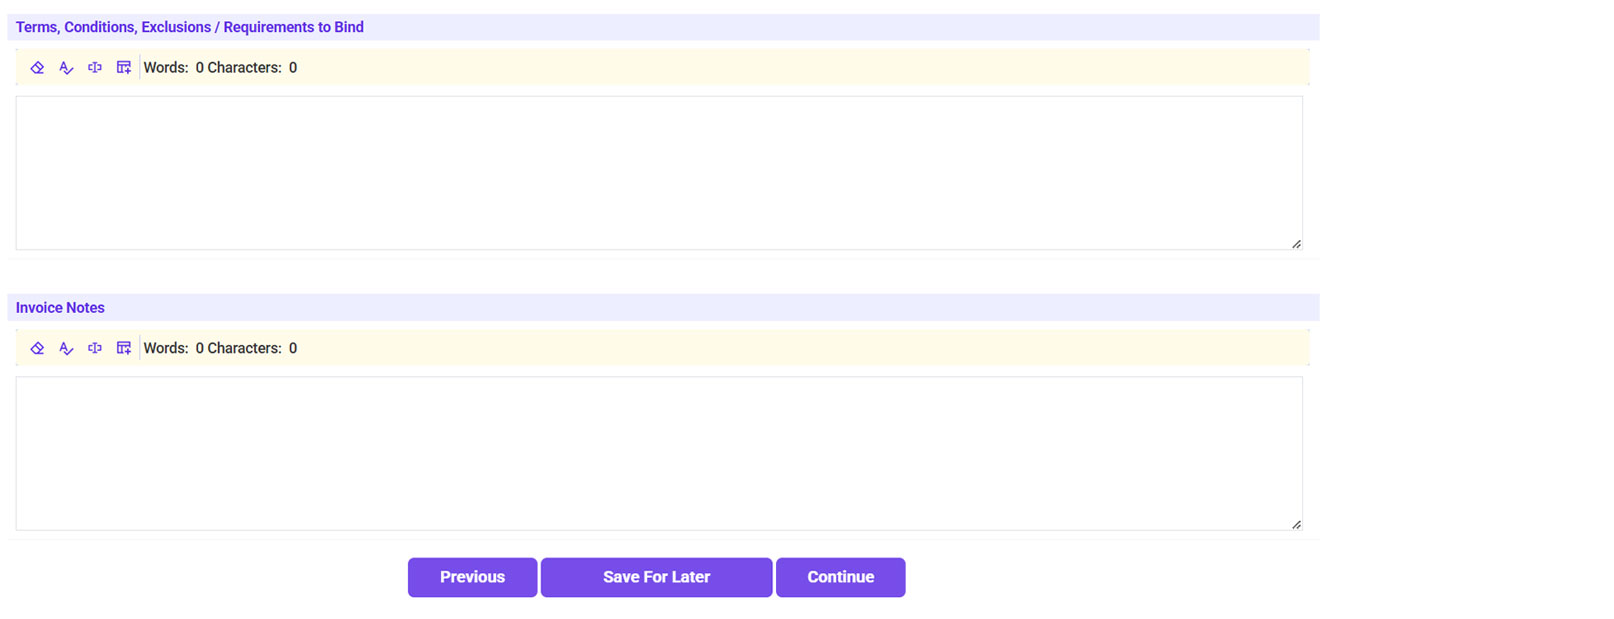
- Click Continue on the Policy Forms page.
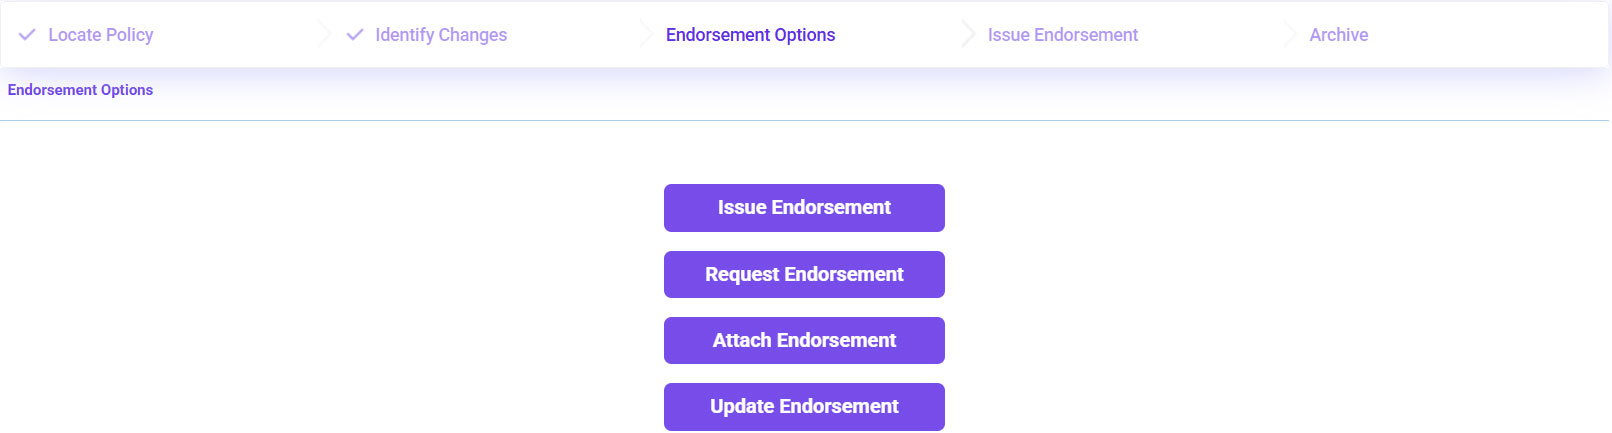
- Click Issue Endorsement.
- Enter the Endorsement Premium as shown on the provided document/carrier’s endt (if the endt premium is a return premium amount, be sure to enter the negative sign).
- Click Continue.
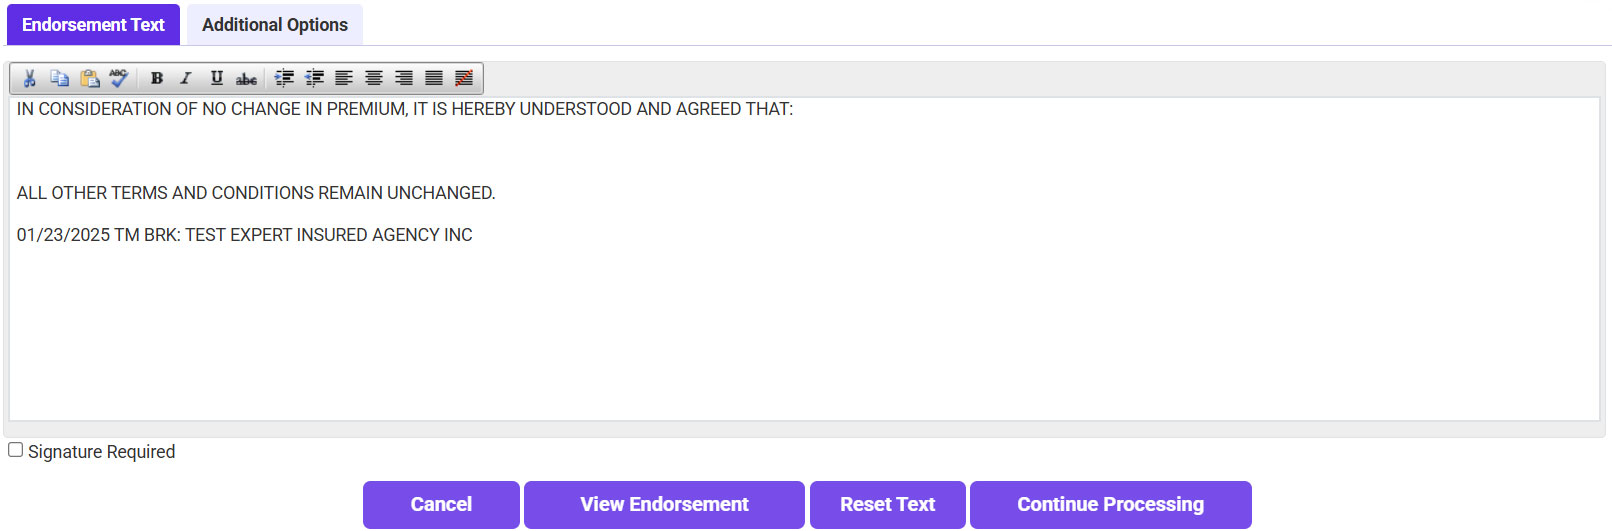
- The endorsement wording should automatically be filled in. Click Continue Processing.
- Confirm the information is correct >> Check the Policy and Accounting Information Verified box >> Click Continue.
- Email the endorsement.
- Click on ‘To’ and select the recipient.
- If needed, send a copy to yourself as well.
- Click Continue.
- Email the endorsement and invoice.
- Click on ‘To’ and select the recipient.
- If needed, send a copy to yourself as well.
- Click Continue.